|
|
Post by BuggyJim on Oct 17, 2006 10:53:01 GMT
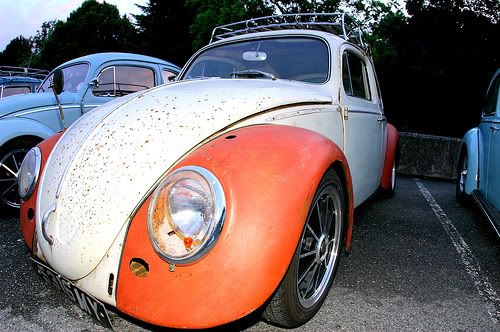
Well I have finally got round to doing some more stuff on the single. As you can see from the pics it is mostly dismantling at this stage which is the easy bit so hopefully i'll not run out of steam and it'll be back together in the not too distant future  Out with the rusty battery tray which had a nice bit of steel rivited over it  New one in place but not yet welded in (need a new mask)  Area under tank in treasure chest that needs sorting.  Cab floors need attention also  Another nice repair by the P.O.!! 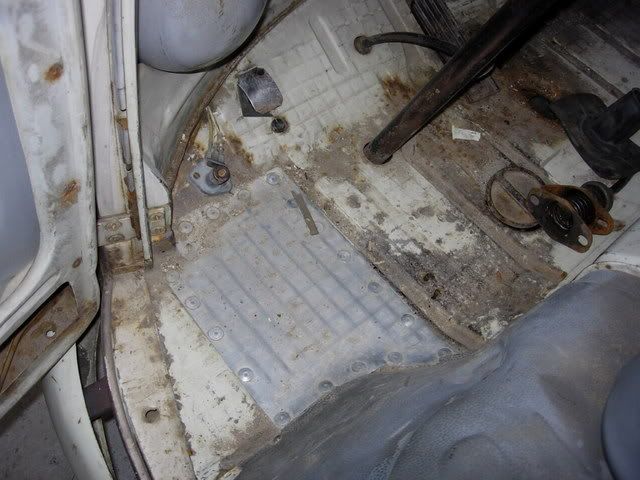 Beam and spindles are off for fitting of adjusters / flipping 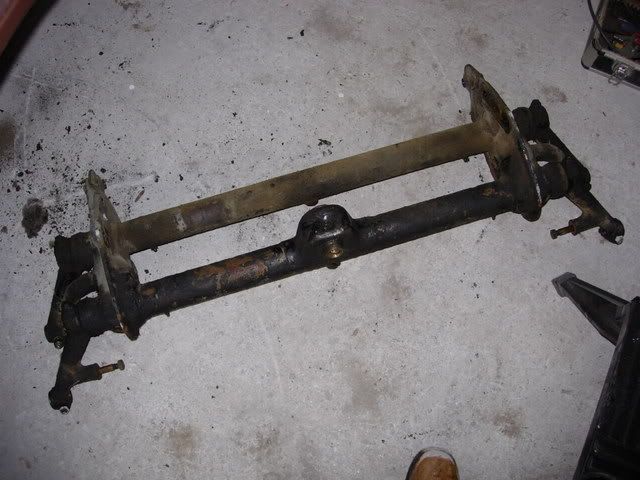 Engine, gearbox, axles etc off for straight axle conversion.  Fun, fun, fun  |
|
|
|
Post by Vince on Oct 17, 2006 17:54:08 GMT
Sweeeet! good work Jim!  |
|
|
|
Post by Nic on Oct 17, 2006 19:49:03 GMT
Ahhh so thats where you have been locked in your garage  Nice work Jim looks like its coming along really well  Almost too easy  |
|
|
|
Post by BuggyJim on Oct 18, 2006 8:09:00 GMT
It all comes apart easily and quickly enough - not so sure about the re-assmebly  |
|
|
|
Post by Mike on Oct 29, 2006 20:57:34 GMT
good work so thats what a garage is for! I had forgot!
**Buffer alarm!!**
its a funny looking battery tray i kind of like it
|
|
|
|
Post by BuggyJim on Dec 8, 2007 10:32:20 GMT
Well it's been over a year since my last post here and it's still not done  Here are a few pics of what I have managed.... Cut out rusty floor sections  New port and starboard floors sections  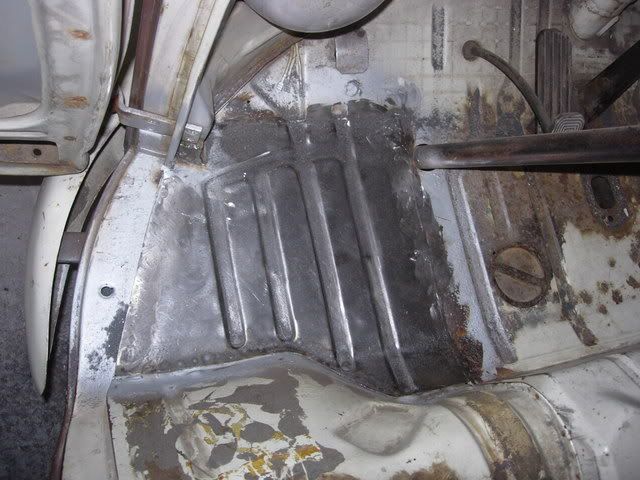 Few holes under drivers seat  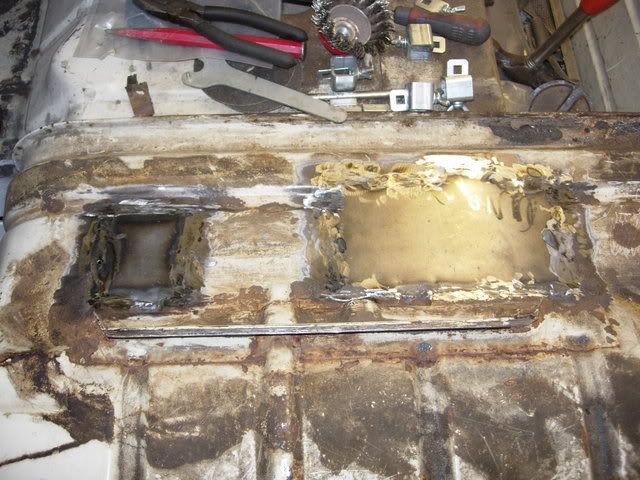 Cut out rusty treasure chest floor under fuel tank - i have welded in repair sections now and new tank supports but have no pics  Rust in the lower screen surround - doesn't look too bad but there were a few holes  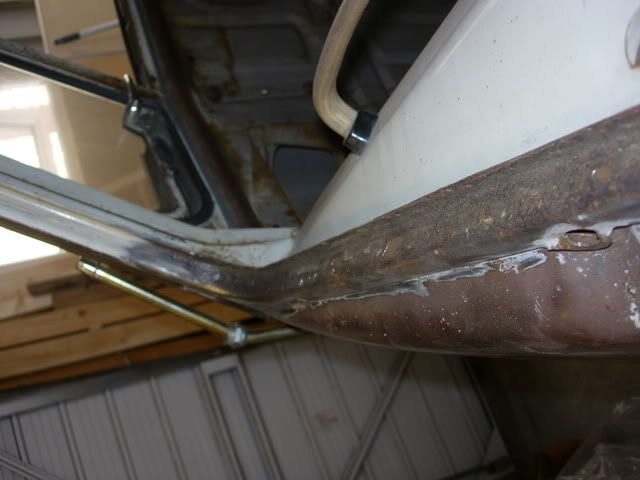 Cut out  New section in - it is an Autocraft panel but still needed to be cut in a few places to fit  |
|
|
|
Post by BuggyJim on Dec 8, 2007 10:38:31 GMT
And yesterday I finished off my rotisserie thingy and tipped it on its side!! 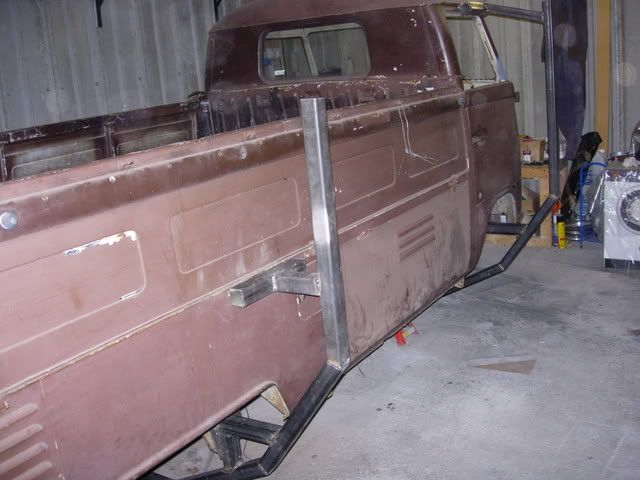 Just enough clearance   Was a bit tricky pushing it over, about half way it got really heavy so I had to do it inch by inch with a jack and supports. Fortunately the last section it rolled itself so is stable on its side and the supports are there just in case - I don't want to get squashed So now I want to clean up the underneath and get some sort of protection on there to keep the rust at bay. Hopefully it will be less than a year before the next episode |
|
|
|
Post by carbon on Dec 8, 2007 11:22:39 GMT
Good work fella - best get it finished though before you get hitched and aren't allowed to finish it |
|
|
|
Post by Pauly on Dec 10, 2007 18:42:56 GMT
So you going to punting around in it next summer, you gotta make Newquay surely  |
|
|
|
Post by Vince on Dec 10, 2007 20:03:49 GMT
Looking good dude! ........................... i gotta get me a bigger garage |
|
|
|
Post by BuggyJim on Dec 10, 2007 20:42:27 GMT
So you going to punting around in it next summer, you gotta make Newquay surely It will DEFINITELY be on the road for RTTS 2008/9/10 |
|
|
|
Post by BuggyJim on Apr 11, 2008 17:51:26 GMT
Well there has been a little more progress.... New fuel tank supports and panels in treasure chest floor. I have also put the divider strip back in but it is not in this pic. 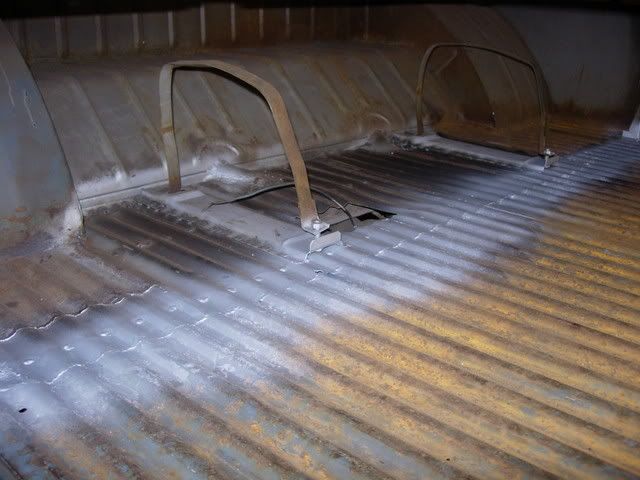 Got all the underside cleaned up and de-greased (the worst job so far and took ages!) then painted with Epoxy Mastic from www.rust.co.uk. The paint goes on quite well and seems well stuck on there so lets hope it will keep the rust at bay for a few years. I have also got some Dinitrol cavity wax so next job is to wax me cavities 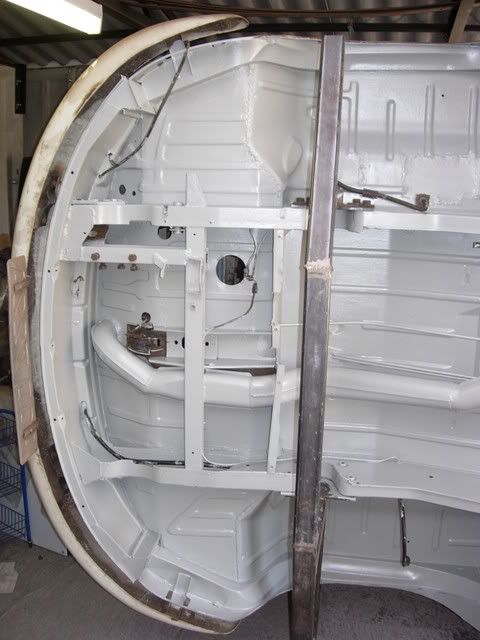  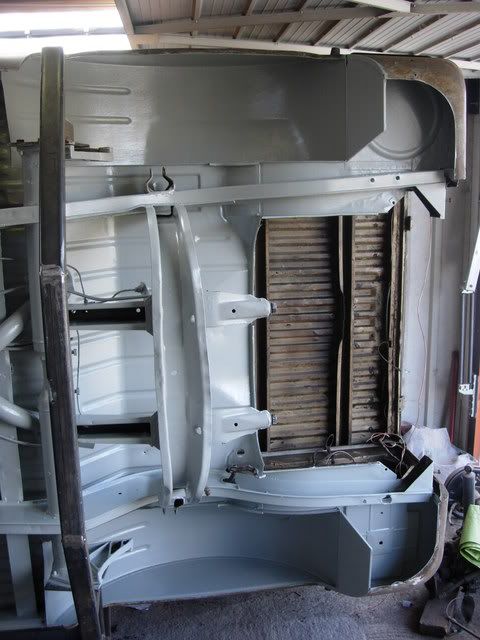 The paint looks white in the photos but is actually grey. |
|
|
|
Post by BuggyJim on Jul 28, 2008 20:45:40 GMT
Ok next I have been... Stone chipped under the arches and sprayed Dinitrol in all the box sections and cavities 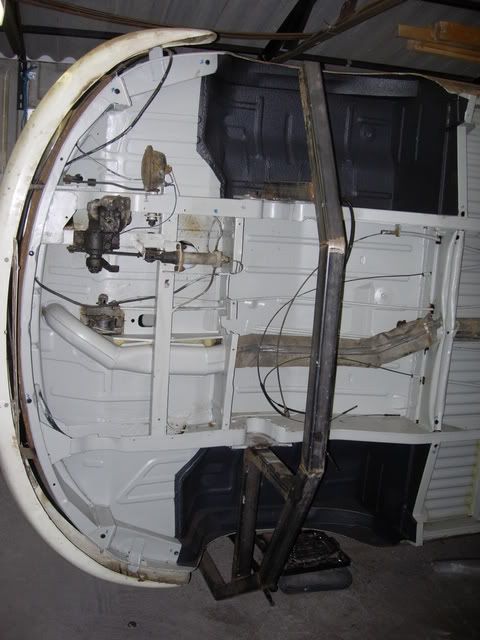 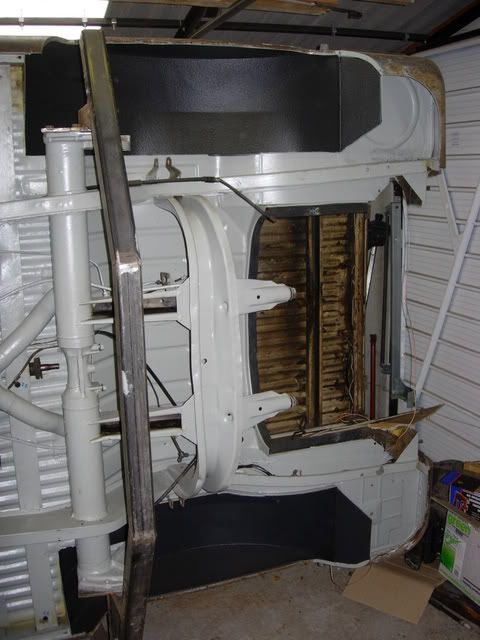 You can see that i also fitted some of the bits that go underneath whilst it was still on its side. Then I started to play with the gearbox to find all was not well. The guy that sold it to me assured me it came out of a running car but he turned out to be a lying tosser  When I drained the oil a lot of silver goo came out instead, then I found that when you turn the input shaft with it in gear the axles were not turning  I took the axles off the box and removed the side plates to find this: 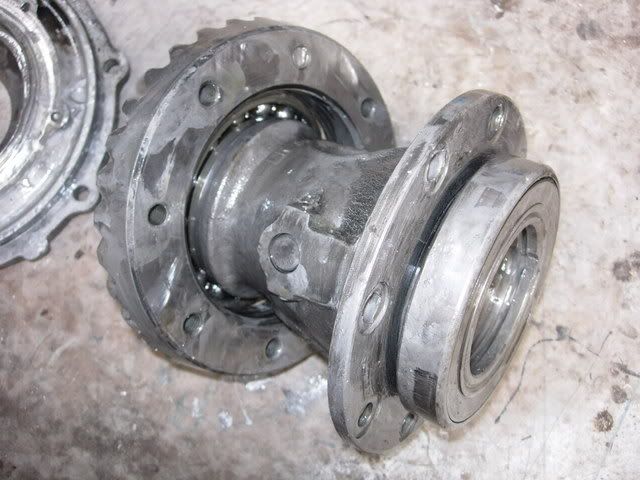  All of the bolts had come out of the ring gear and ground into the side plate and the ring gear was floating free hence no drive. Once I had it this far apart I could see the rest of the box seemed to be working ok so I decided to try and sort it out. Vince had a box out of one of his bugs that was no good so I used the ring gear bolts and side plate off that to replace my damages ones. I also took the gear carrier out of the box to double check the cogs etc looked ok and clean the rest of the silver goo out. Looks ok to me!    Where do these bits go? 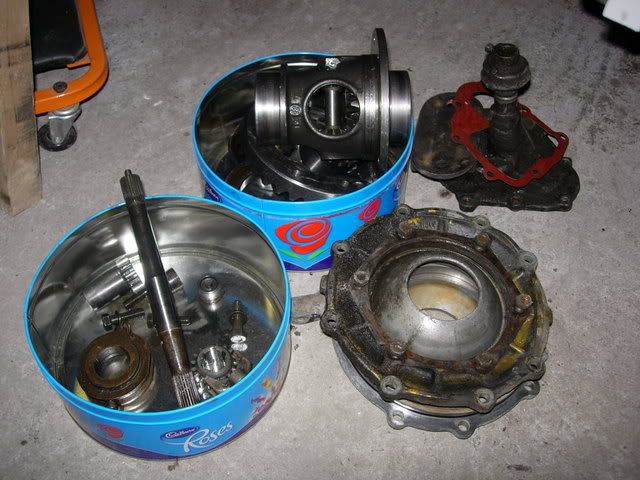 |
|
|
|
Post by BuggyJim on Jul 28, 2008 20:53:18 GMT
Once i had cleaned all the gearbox bits up I stuck it back together replacing all seals and gaskets. I also painted the axle tubes. I couldn't be arsed to clean the outside of the box as it is a crap job and there is a chance it may not work right so I left it as it was. I also replaced the nose cone bushes as there was a lot of play in the hockey stick. On the ground it all seems to work ok by hand.  Got the beam painted up. I put the adjusters in ages ago but didn't get any in progress pics. It is still standard width so we'll see how it sits with stock rims.  Cut/welded/bolted straight axle adapters and spring plates together then painted.  |
|
|
|
Post by BuggyJim on Jul 28, 2008 21:04:43 GMT
So now the truck is the right way up again So I have got the beam, drop spindles and front brakes all back on as well as the gear linkage, steering box and pedals. 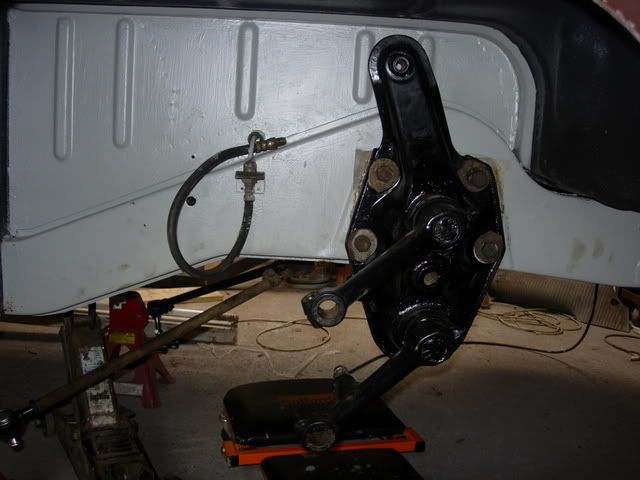 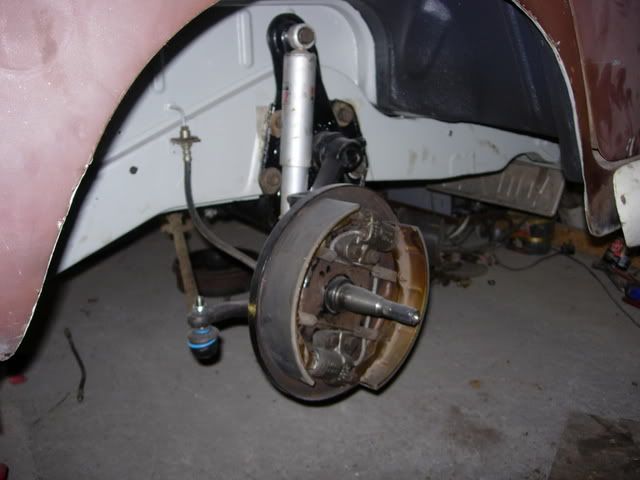 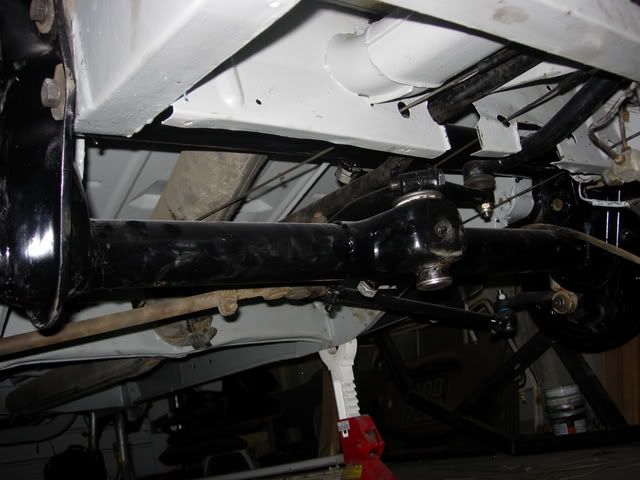 Flipped tie rod ends with bay window ball joints... 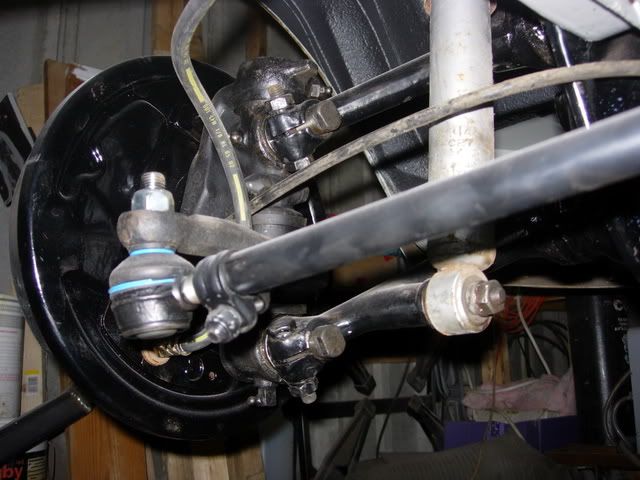 And at the rear the gearbox, straight axle kit, and brakes are back on.  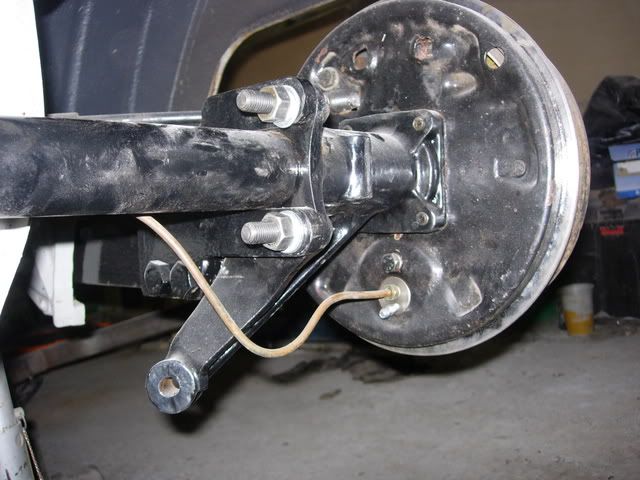 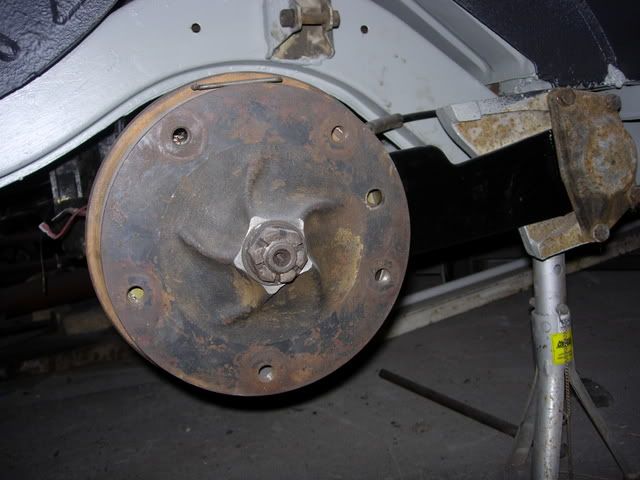 I got some pre '63 drums (thanks Nic) machined up by Mike at Ratt Racing to fit over the beetle rear brakes, he also skimmed the inside of the drum to make it smooth again. I replaced the rear bug cylinders with larger bug front ones to increase the rear braking power a bit. Flexi-hoses were all replaced. I had to put the rear brakes on back to front and upside down to get the handbrake cable to enter through the top to clear the spring plates. This meant re drilling the oil drain holes in the back plates and modding the bearing covers slightly to clear the hand brake spreader plate thingy. Hopefully it will all work ok. I have resprayed my 15" bus rims the correct colour and the tyres are being fitted as I type. I just need to spray my commercial hub caps grey to match and they should look pretty smart  |
|
|
|
Post by Vince on Jul 28, 2008 21:22:54 GMT
Awesome, glad the box was of some use dude (better than sitting in my shed doing nout!)
Cant wait to see on its wheels again mate! what beam are you running?
|
|
|
|
Post by BuggyJim on Jul 28, 2008 21:28:04 GMT
It's the beam that came off it. I haven't narrowed it just put adjusters in. I'll see how it works out with the stock bus rims and narrow it in the future if it needs it.
Do you want the rest of the box back for spares or shall I junk it?
|
|
|
|
Post by Vince on Jul 28, 2008 21:32:28 GMT
Junk it dude.........il be aircooled-less for a while (until at least the new year) so i wont need it |
|
|
|
Post by carbon on Jul 29, 2008 6:59:43 GMT
Nice work - be rolling soon then |
|
|
|
Post by DelBoy on Aug 3, 2008 18:19:22 GMT
looking like you are getting somewhere now mate, im on the lookout for a cheap single cab if your hear of one  |
|